GIMP MCP





Demo
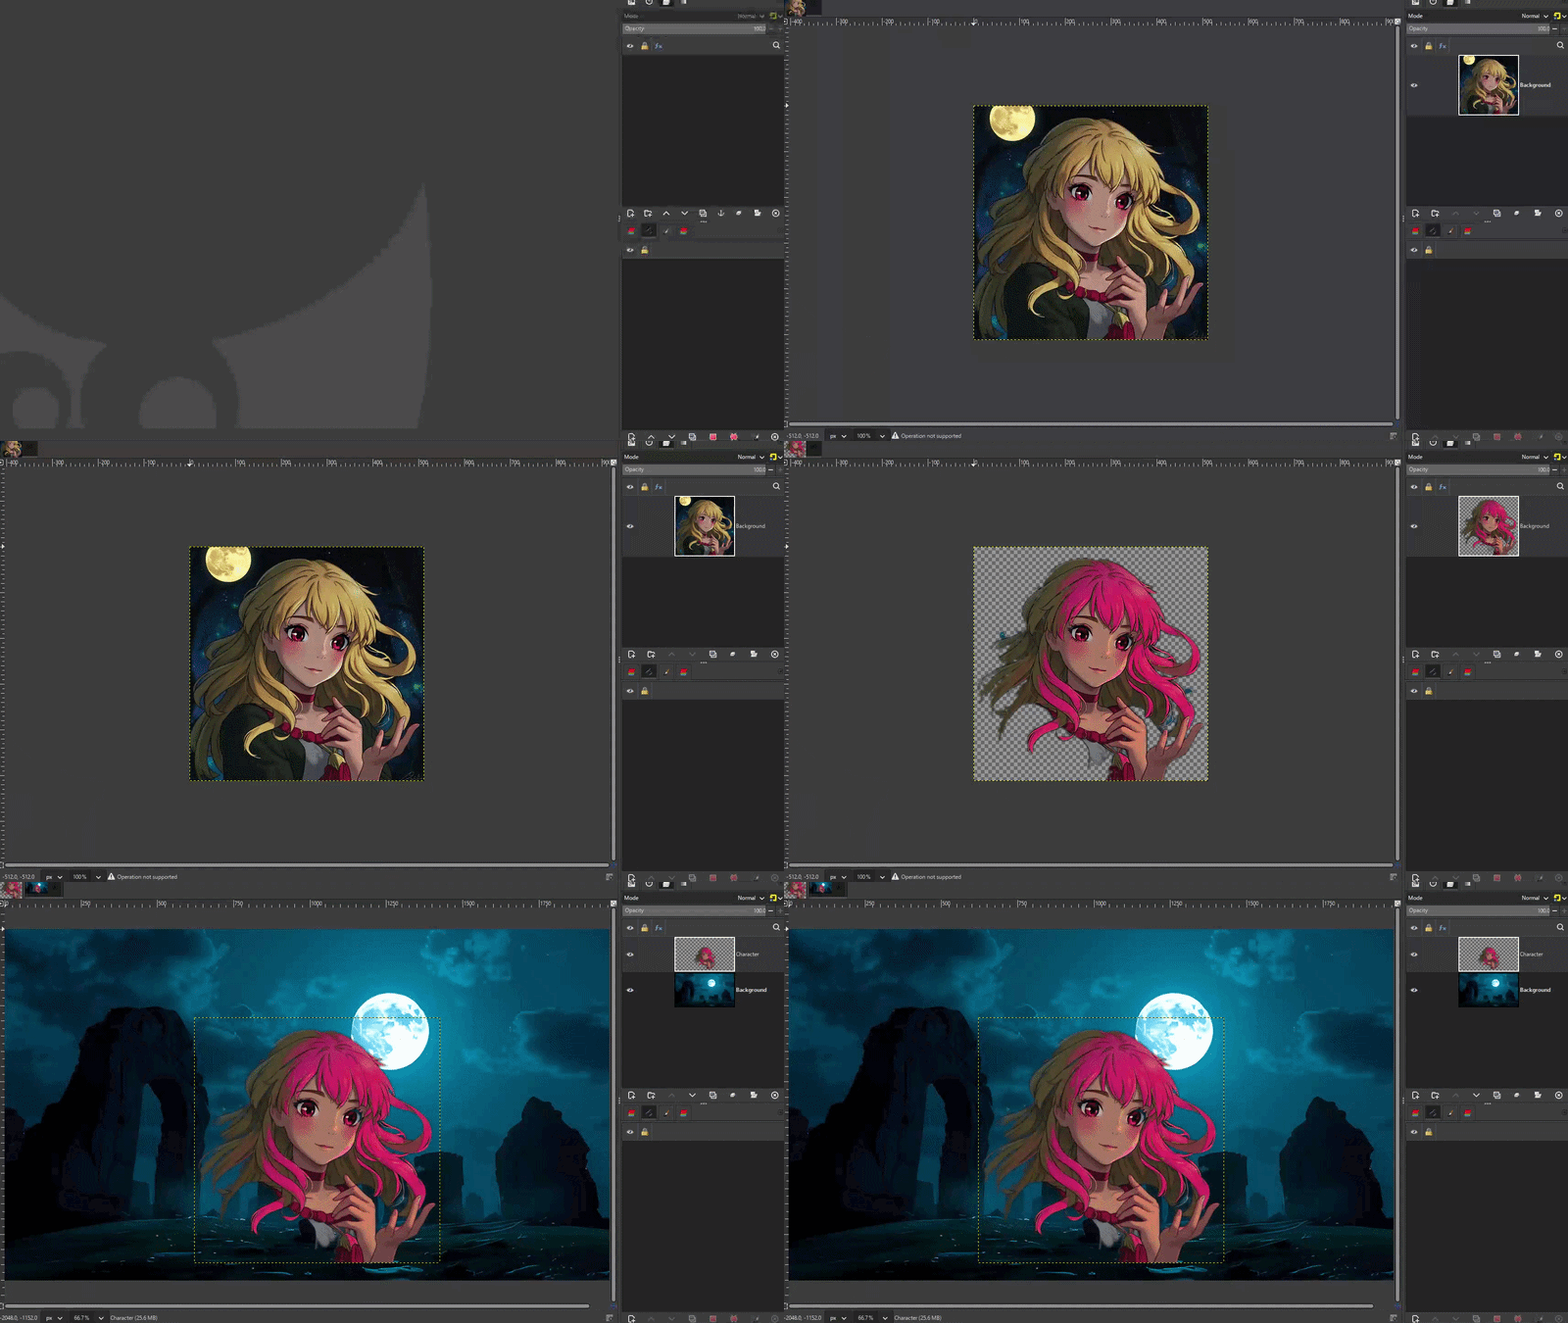
Full demo (with audio): https://github.com/maorcc/gimp-mcp/raw/main/docs/demo.mp4
AI agent using GIMP MCP to remove a background, edit a character's expression, and verify results — all through natural language via Claude
Overview
GIMP MCP bridges GIMP's professional image editing capabilities with AI assistants through the Model Context Protocol. It lets you edit images by describing what you want — and gives the AI a live visual feedback channel to verify each change before moving on.
What makes it different from other GIMP integrations:
-
The AI can see the image at any point in the workflow without saving to disk (
get_state_snapshot) -
Supports fully autonomous multi-step pipelines: open → edit → verify → refine → export
-
56 dedicated tool commands covering every major GIMP operation
-
Fully compatible with GIMP 3.2.x (all breaking API changes resolved)
Key Features
👁️ Live Visual Feedback
get_state_snapshot returns a PNG preview mid-workflow so the AI verifies each step
🎨 56 GIMP Tools Adjustments, transforms, selections, layers, drawing, text, filters — all via MCP
🔧 GIMP 3.2 Compatible All GIMP 3.2 API breaks fixed and tested (56/56 passing)
🔁 Iterative Workflows AI loops until a goal is met — e.g. keeps removing BG until no pixels remain
🖼️ Region Snapshots Zoom into any area for detail verification (face, mouth, corner, etc.)
🔌 Universal MCP Works with Claude Desktop, Claude Code, Gemini CLI, PydanticAI, and more
What Can It Do?
Background Removal with Iterative Verification
The AI removes the background, takes a snapshot to inspect the result, detects remaining pixels, and loops until the image is clean:
"Remove the background from this image and keep looping until only the character remains"
Expression Editing
"Make the character smile — paint a smile arc with teeth over her mouth"
Complex Multi-Step Pipelines
"Open navi_portrait.png, remove the background, verify it's clean,
 then make her smile and export the final result as a PNG"
Color & Tone Work
"Boost the contrast, shift the hue 15 degrees warmer, then show me a before/after zoom of the face"
Text & Compositing
"Add a bold title at the top in white with a subtle drop shadow, then export for web"
Prerequisites
-
GIMP 3.2+ — tested on GIMP 3.2.2 (Windows, macOS, Linux)
-
Python 3.8+ — for the MCP server
-
uv — Python package manager (
pip install uv) -
MCP-compatible AI client — Claude Desktop, Claude Code, Gemini CLI, PydanticAI, etc.
Quick Start
1. Install Dependencies
git clone https://github.com/maorcc/gimp-mcp.git
cd gimp-mcp
uv sync
2. Install the GIMP Plugin
Copy gimp-mcp-plugin.py to GIMP's plug-ins directory and restart GIMP.
Which directory? GIMP names its per-user folder after its major.minor version
(3.0, 3.2, 3.4, …) and creates a fresh one on each minor upgrade, so the folder
moves when you upgrade GIMP (e.g. 3.0 → 3.2). The snippet below auto-selects the
newest one, so it keeps working across upgrades. To check the path manually, open GIMP
and look at Edit → Preferences → Folders → Plug-ins.
Launch GIMP at least once before running this, so its config folder exists.
macOS / Linux:
# Pick the base directory for your platform:
BASE="$HOME/Library/Application Support/GIMP"     # macOS
# BASE="$HOME/.config/GIMP"                        # Linux (standard)
# BASE="$HOME/snap/gimp/current/.config/GIMP"      # Linux (Snap)

# Auto-select the newest GIMP 3.x config directory (3.0, 3.2, 3.4, ...):
GIMP_DIR="$(ls -d "$BASE"/3.* 2>/dev/null | sort -V | tail -1)"
if [ -z "$GIMP_DIR" ]; then
  echo "No GIMP 3.x config dir found under $BASE — launch GIMP once, then re-run." >&2
  exit 1
fi
mkdir -p "$GIMP_DIR/plug-ins/gimp-mcp-plugin"
cp gimp-mcp-plugin.py "$GIMP_DIR/plug-ins/gimp-mcp-plugin/"
chmod +x "$GIMP_DIR/plug-ins/gimp-mcp-plugin/gimp-mcp-plugin.py"
echo "Installed into: $GIMP_DIR/plug-ins/gimp-mcp-plugin"
Windows:
%APPDATA%\GIMP\<VERSION>\plug-ins\gimp-mcp-plugin\gimp-mcp-plugin.py
Replace <VERSION> with your GIMP major.minor (e.g. 3.2). No chmod needed on Windows. Just copy and restart GIMP.
For all platforms: GIMP Plugin Installation Guide
3. Start the MCP Server in GIMP
-
Open any image in GIMP
-
Go to Tools > MCP > Start MCP Server
-
Server starts on
localhost:9877
4. Configure Your MCP Client
Claude Desktop
~/.config/Claude/claude_desktop_config.json (Linux/macOS) or %APPDATA%\Claude\claude_desktop_config.json (Windows):
{
  "mcpServers": {
    "gimp": {
      "command": "uv",
      "args": ["run", "--directory", "/full/path/to/gimp-mcp", "gimp_mcp_server.py"]
    }
  }
}
Claude Code
cd /path/to/gimp-mcp
claude  # .mcp.json is auto-detected
Or manually:
claude mcp add gimp-mcp -- uv run --directory /full/path/to/gimp-mcp gimp_mcp_server.py
Gemini CLI
~/.config/gemini/.gemini_config.json:
{
  "mcpServers": {
    "gimp": {
      "command": "uv",
      "args": ["run", "--directory", "/full/path/to/gimp-mcp", "gimp_mcp_server.py"]
    }
  }
}
PydanticAI
from pydantic_ai import Agent
from pydantic_ai.mcp import MCPServerStdio

server = MCPServerStdio('uv', args=['run', '--directory', '/path/to/gimp-mcp', 'gimp_mcp_server.py'])
agent = Agent('openai:gpt-4o', mcp_servers=[server])
Available MCP Tools
👁️ Visual Feedback
get_state_snapshot(image_index, max_size, region, label)
Returns a live PNG of the current image state — the AI's primary feedback mechanism. Call this between any edits to verify the result without saving to disk.
# Full image snapshot
snapshot = get_state_snapshot(max_size=512)

# Zoom into a face region for detail inspection
snapshot = get_state_snapshot(
    region={"x": 140, "y": 80, "width": 240, "height": 300},
    max_size=512,
    label="face-check"
)
This enables iterative agentic workflows: edit → snapshot → assess → refine → repeat.
get_image_bitmap(image_index, max_width, max_height, region)
Lower-level bitmap fetch with region extraction and scaling. Returns base64-encoded PNG.
🎨 Adjustments
Tool Description
adjust_brightness_contrast
Brightness and contrast
adjust_curves
Curves by channel (RGB/R/G/B/A)
adjust_hue_saturation
Hue, saturation, lightness
adjust_color_balance
Shadows/midtones/highlights color balance
auto_levels
Auto-stretch levels
desaturate
Convert to grayscale (keep RGB mode)
invert_colors
Invert all channels
sharpen
Unsharp mask sharpening
blur
Gaussian blur
denoise
Noise reduction
🔄 Transforms
Tool Description
scale_image
Scale to exact dimensions
scale_to_fit
Scale within bounding box (aspect-safe)
crop_to_rect
Crop to rectangle
rotate_image
Rotate 90/180/270 or arbitrary angle
flip_image
Flip horizontal or vertical
resize_canvas
Resize canvas without scaling content
✂️ Selections
Tool Description
select_rectangle
Rectangular marquee
select_ellipse
Elliptical marquee
select_by_color
Select by color (global)
select_all / select_none
Select all / deselect
invert_selection
Invert selection
modify_selection
Grow, shrink, feather, or border
🗂️ Layers
Tool Description
create_layer
New empty layer
duplicate_layer
Duplicate active layer
delete_layer
Delete named layer
rename_layer
Rename layer
set_layer_properties
Opacity, blend mode, visibility
reorder_layer
Move layer in stack
merge_visible_layers
Flatten visible to one layer
flatten_image
Flatten all layers
list_layers
List all layers with properties
🖌️ Drawing & Fill
Tool Description
fill_layer
Fill entire layer with color
fill_selection
Fill selection (foreground/background/transparent)
fill_rectangle
Fill a rectangle region
fill_ellipse
Fill an ellipse region
draw_line
Draw a line (pencil or paintbrush)
draw_rectangle
Draw a rectangle outline
draw_ellipse
Draw an ellipse outline
gradient_fill
Apply linear or radial gradient
set_colors
Set foreground/background colors
🔤 Text
Tool Description
add_text
Add a text layer
edit_text
Edit existing text layer
list_fonts
List available fonts
✨ Filters & Effects
Tool Description
apply_gaussian_blur
Gaussian blur filter
apply_pixelate
Pixelate/mosaic effect
apply_emboss
Emboss effect
apply_vignette
Vignette darkening
apply_noise
Add noise/grain
apply_drop_shadow
Drop shadow effect
📁 File Operations
Tool Description
open_image
Open image file
export_image
Export to PNG, JPEG, BMP, TIFF
new_canvas
Create bl